Recently, we at SEGGER released AppWizard, our new GUI design tool for our emWin embedded graphics library. It is now available as part of the emWin PRO package (v6.10 and later).
In Part I of this blog article, I showed how to create a very common type of gauge – a circular gauge – by using a rotary object.
But not all gauges are round; quite often gauges are straight, and they may have vertical or horizontal orientation. So the rotary object in AppWizard won’t work for these types of gauges. Luckily, there is another widget in the AppWizard that can help us out – the slider widget.
Creating a linear gauge in AppWizard using the Slider widget
Just like with the rotary object, we can re-purpose the slider object to take on the appearance and behavior of a gauge, displaying data to the user. And just like before, we have to take care of the look as well as the behavior.
The look
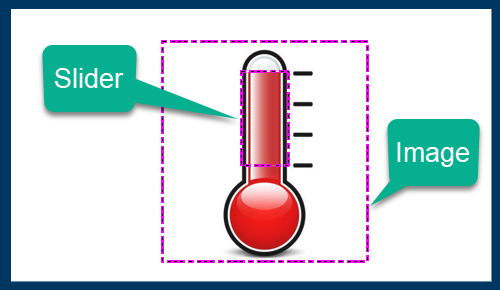
Let’s assume we want to make a thermometer-style gauge. We have a subscription to 123rf.com, where I found a static image of the thermometer below. Of course you can create your own in your favorite graphics software, or use any other stock photo provider.

Again: So far, this is just a static image. Now, let’s bring it to life.
The behavior
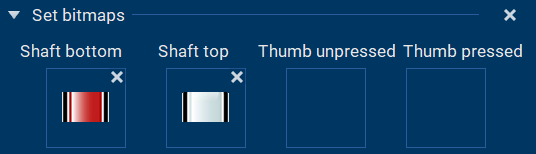
After adding a slider widget to our AppWizard project, we first need to set it to vertical mode:

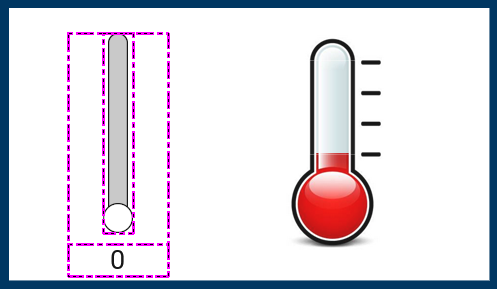
We will need to take care of two bitmaps: the shaft bottom, and the shaft top. For this, we will need to do some image editing. Let’s grab a slice of the top part of the thermometer and make that the shaft top. A slice of the bottom part of the thermometer will serve as the shaft bottom.
Now we have a slider that works pretty well as the thermometer gauge:
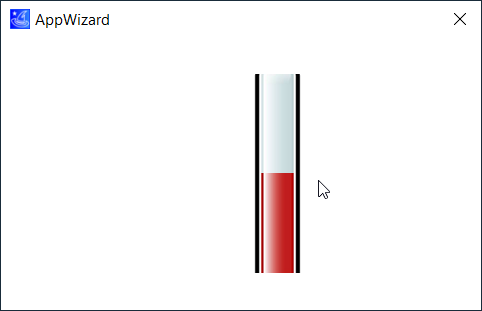
All we have to do now is add an image object with the original thermometer and place our slider-turned-gauge on top of the image.
Now, when we enter the AppWizard play mode, we can move the slider up and down, and the effect is pretty good.
Simulating the data
Just like with the rotary in Part I, we want to control the slider from within the application, not via external touch input. So, again, we need to add a variable, another slider to simulate the data driving the gauge, and some Interactions.

The result
The complete simulation now looks and feels like this:
Not bad at all!
A second type of linear gauge
If we wanted to create a linear gauge with an indicator in addition to (or instead of) a filled-in ‘level’, we could do that as well.
In the example above, I didn’t use any bitmaps for the shaft, just a bitmap of a black triangle for the thumb. So most of the slider is invisible, except for the thumb. The scale is just a static image, which is fine in this case.

Summary and Outlook
AppWizard’s flexibility lets us re-purpose the slider widget as a pretty nice linear gauge, both horizontally as well as vertically.
If you have access to AppWizard and you would like to try the examples above, feel free to download them from here:
Thanks for reading!