In Part I and Part II of this three-part blog post series, I described how I started recreating one of my favorite electronic games from the early 1980s, Ravensburger’s Galaxis, on the NXP evaluation kit for the i.MX RT1052, using SEGGER tools and software. I also went over the development of the bulk of the game using the AppWizard GUI design tool for emWin, the Embedded Studio IDE, and the J-Link debug probe. Part III describes the culmination of this project.
Implementing the black markers
There is one more interesting element to this game that sets apart experienced players from novices, and that emphasizes strategy over luck when searching for the ships: the black markers.
As you are playing the game, situations arise that help you identify coordinates that cannot possibly hold a ship. For example, upon probing a grid position, you may get a “0” back, meaning that no ships can be seen from that grid position. In the original game, a player would then happily mark off all of the grid locations extending out from that “0” with black markers, thereby significantly reducing the number of grid locations where ships might be hidden. Similarly, when a buoy responds with a “1”, and you already found that one ship, you know that no additional ships can be located on any of the grid locations extending out from that “1”. The same principle applies to the other possible responses (“2”, “3”, and “4”).
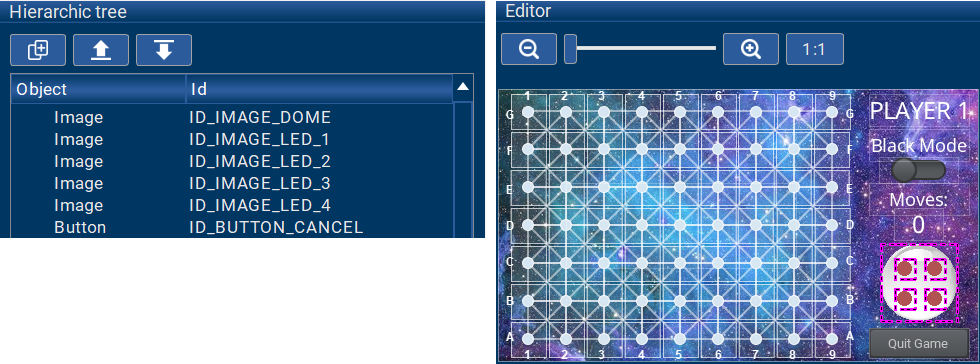
I therefore had to find a way to allow a player to place black markers onto the game grid to emulate this strategic element of the game. I decided to add a switch object to the game screen in AppWizard, which would allow the player to enter and exit what I called Black Mode. I also added a variable to track (and signal to the user code) whether Black Mode was turned on or off (ID_VAR_BLACK_MODE_ON), as well as a text object to label the new switch on the screen.
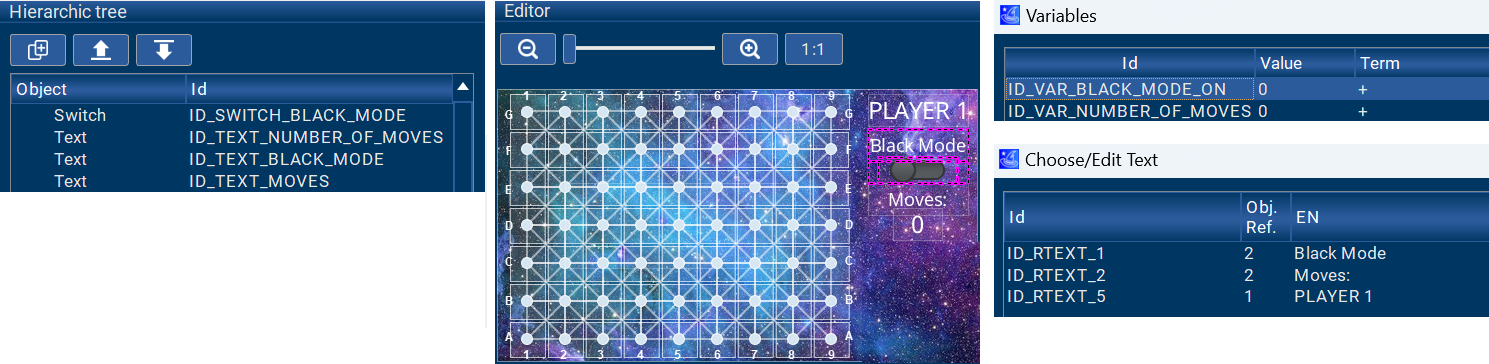
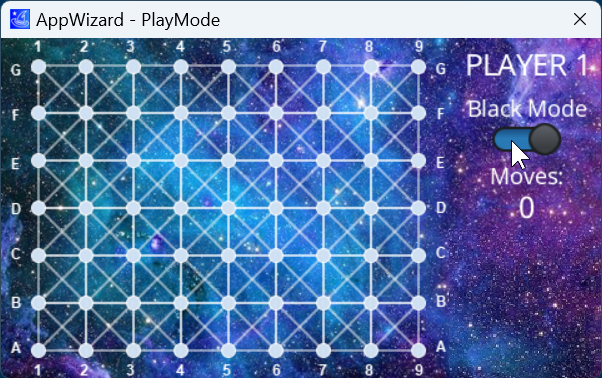
While I was at it, I added a text object in decimal mode for displaying the number of moves that had been made in a game, a variable to hold that value (ID_VAR_NUMBER_OF_MOVES), and a regular text object (“Moves:”) as a label. I also added a text object for “PLAYER 1” (in anticipation of a two-player mode). Activating the Play Mode in AppWizard gave me a good indication of how the switch object was going to behave on the screen:
Note that I could have easily changed the look and feel of the switch object using its object parameters (just as you can easily customize any other object in AppWizard, as well):
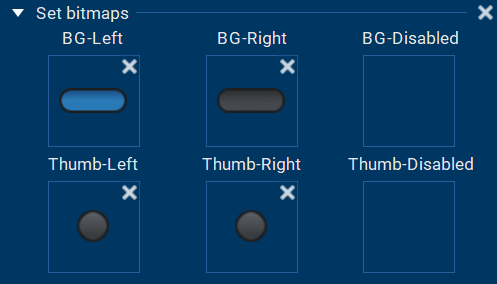
However, I felt that the default switch looked just fine, so I kept it as-is.
Some additional interactions were also required to add more behavior to the GUI:

The first two interactions simply set the two new variables to 0 whenever the game screen is initially created. Interaction 3 set the Black Mode variable (ID_VAR_BLACK_MODE_ON) to 1 when the switch was being enabled, and interaction 4 set that same variable to 0 when the switch was being disabled.
My user code would then be able to check the value of this variable to determine whether Black Mode was on or off and act accordingly. The last interaction updated the number of moves in the display, if variable ID_VAR_NUMBER_OF_MOVES had been incremented from within my user code.
I then had to add code to my touch-evaluation routine in order to handle the new Black Mode. The AppWizard API call APPW_GetVarData() can be used to query the value of a variable set up by the AppWizard code:
int black_mode = 0;
[...]
black_mode = APPW_GetVarData(ID_VAR_BLACK_MODE_ON, &error); // determine if Black Mode is on
If Black Mode was off, I would just evaluate the grid position as normal. If Black Mode was on, I would place a black marker onto that grid position. And, if the grid position already had a black marker, I would remove it. This was the equivalent of taking a black marker out that was placed in the wrong place by mistake (which happens).
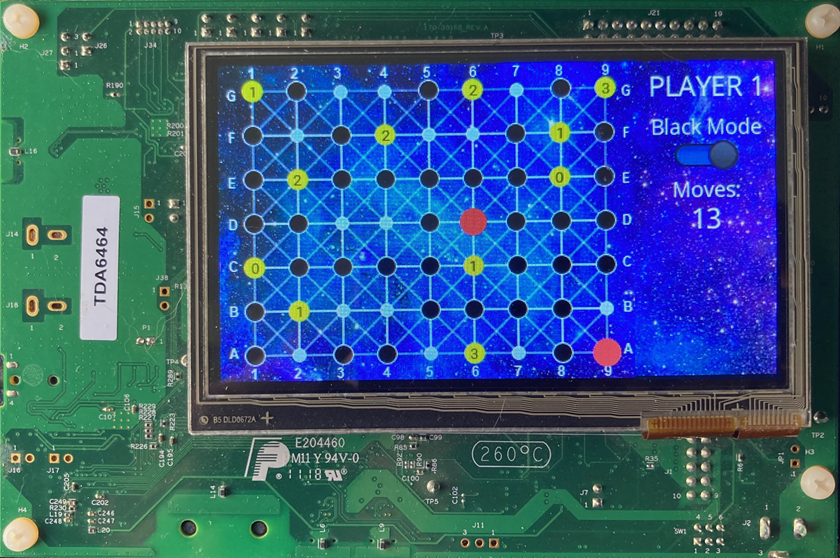
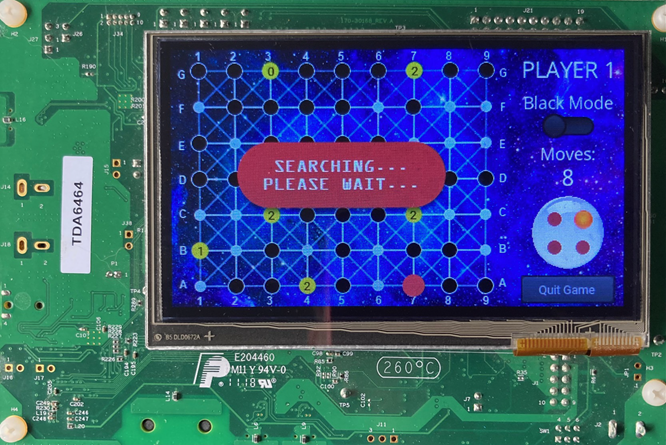
By now, the game was pretty much complete! By eliminating additional grid positions, can you figure out where the two remaining ships must be located in the game instance below? (Hint: See image caption for the solution!)
The finishing touches
As I mentioned in the beginning, the original game has a small plastic dome with four LEDs that indicate the search process. So, I implemented that in AppWizard by using a few image objects:
In my user code, I then added a routine to control the LEDs in the rotating pattern found in the original game during the “search”. This adds a bit of a delay between the act of tapping a grid location and receiving the result, which only heightens the suspense of what that grid position will reveal!
I also added a button object used for quitting the game, if the player wants to restart.
The last important thing missing was the two-player mode. I created a copy of the game screen for player one and adapted it for player two. (I realize that there are more elegant ways to implement the second player, but I didn’t want to put too much more time into this…)
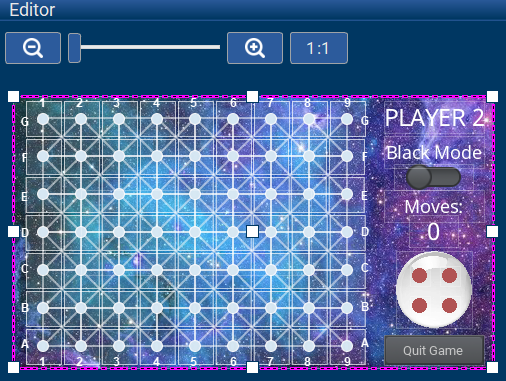
In my user code, I then also made the necessary adaptations to handle a second player.
In order to switch players, I added a third screen and some screen transitions in AppWizard, which are really easy to do using the properties of the screens, as shown below:
After Player 1 is done with their move, they can simply swipe their game screen to the left, which then brings up the neutral middle screen. Player 1 then passes the board to Player 2, who can swipe left again to access their screen. Then the board goes back to Player 1 after Player 2 swipes their game screen to the right. This way, the opponents aren’t able to peek at each other’s game grid when taking turns! I just had to make sure to enable the Persistent Mode in the AppWizard screen properties, so all data on the screens was preserved when switching players. A very useful feature!
Just in case you were wondering: Where you see “GO PLAYER 0 !” on the middle screen, I displayed the number of the player who was up next using another AppWizard variable and a text object in decimal mode.
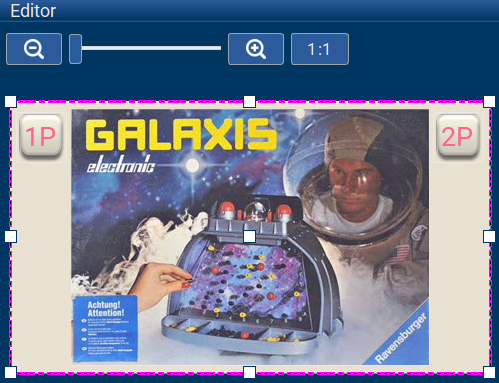
Lastly, I added a title screen that allows selection of a one- or two-player game mode (and the required objects, interactions, and user code).
It’s a wrap!
And there you have it! I successfully revived one of my classic childhood games using SEGGER software and tools — and, naturally, a nice MCU and evaluation board from NXP!
Of course, there are more details I might be able to add over time, such as the iconic sound effects, or the game mode where the two players hide each other’s ships. Or maybe I could even pair up two i.MX RT1050 EVKs for a true two-player game experience!
This project turned out to be a lot of fun, even though my C programming skills felt a bit rusty at the beginning. But, as they say: “It’s like riding a bike.” Right?
One comment:
Comments are closed.